Main content
Quick Reference Guide
How to Assign a Provider
VITALsync How To | Assign a Provider
Provider assignment links a member to a qualified provider within VITALsync, ensuring the right care connection is established to support service delivery and case management.
Navigate to the Provider Panel within the Case Module
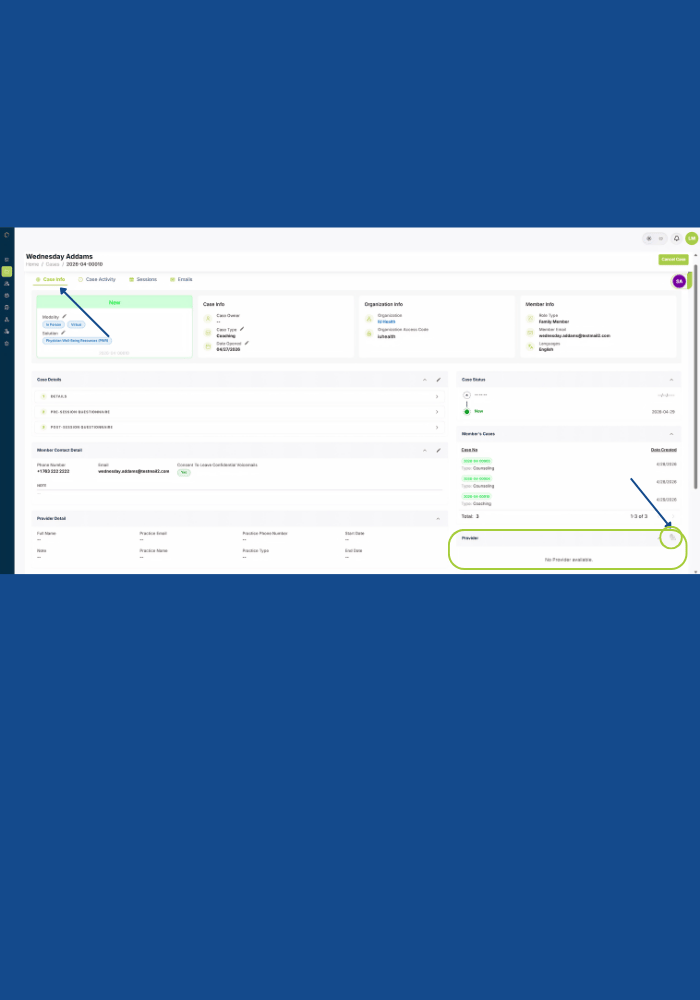
1. Open the case from the Cases module or from the member’s record. The case view displays the Case Info tab by default.
2. Scroll down on the right sidebar to locate the Provider panel. If no provider has been assigned, it will display “No Provider available.”
Open the Reassign Provider Pop-up
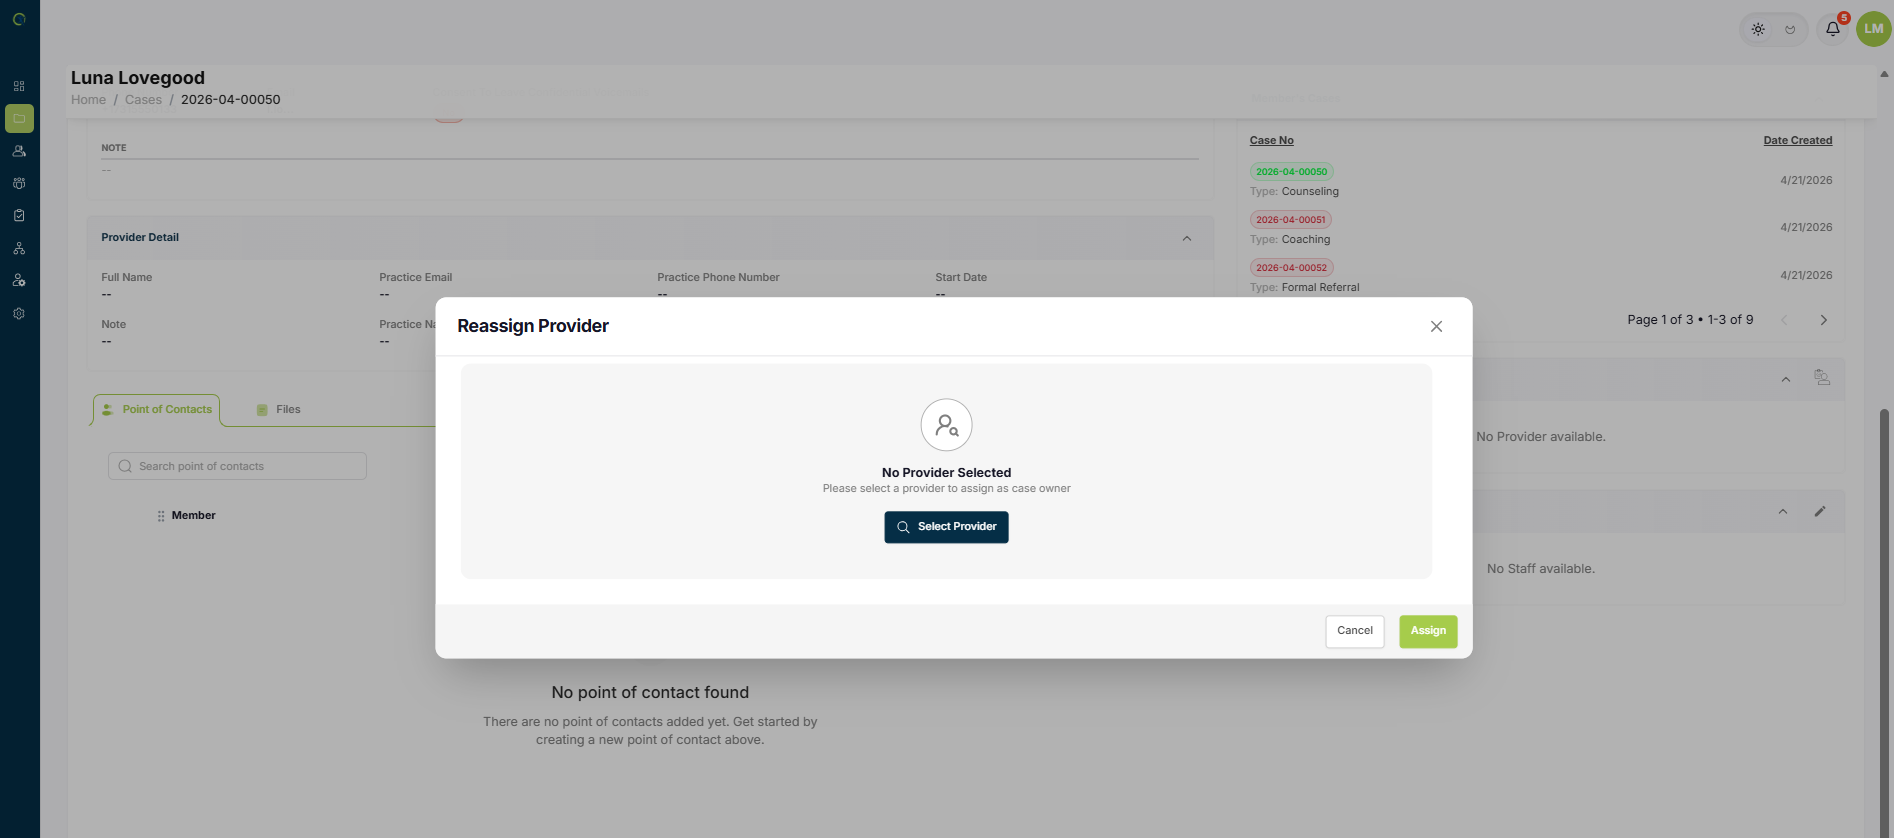
3. Click the assign icon in the Provider panel header (the small person-with-plus icon in the top-right corner of the panel). This opens the Reassign Provider pop-up.
When no provider is assigned, the pop-up displays “No Provider Selected” with a Select Provider button.
4. Click the Select Provider button to open the provider search screen.
Select a Provider Screen
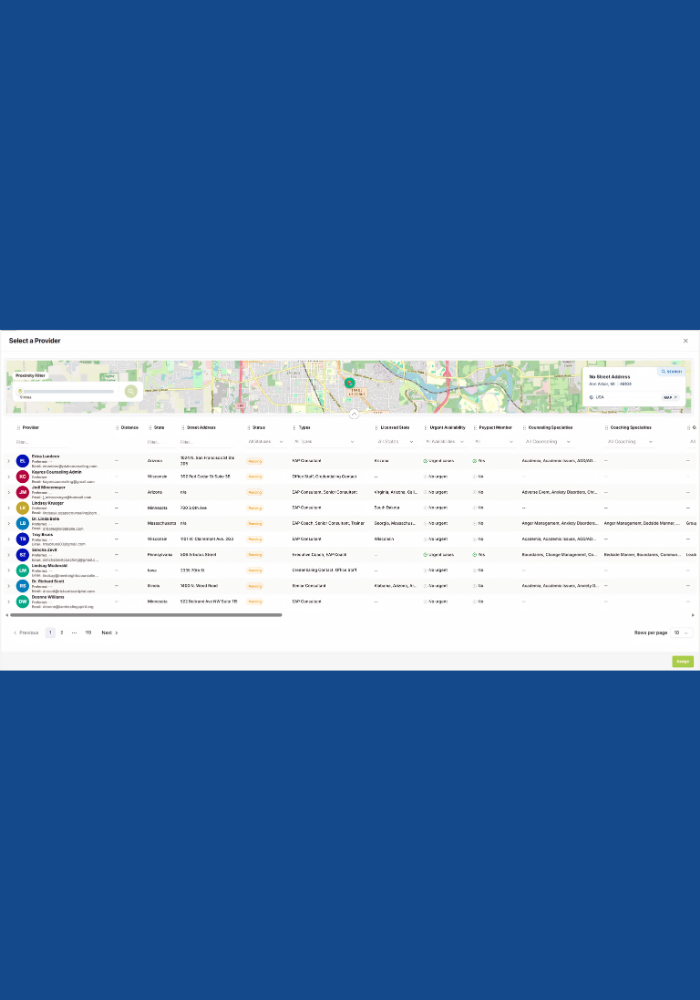
3. The Select a Provider screen displays a map at the top and a scrollable provider list below. You can scroll the table horizontally to view all available columns and drag column headers to reorder them as needed.
Each column includes its own filter to help you narrow your search. The filter type varies by column — for example, some columns use a dropdown list (such as State), while others allow you to type in a value (such as Provider Name). Use whichever combination of filters best fits your search criteria.
Available columns include: Provider Name, Distance, State, Street Address, Status, Accepting Referrals, Types, Licensed State, Urgent Availability, Psypact Member, Counseling Specialties, Coaching Specialties, and more.
Address Search
The provider search is based on the member's address on file. All map and list results are centered around this location by default.
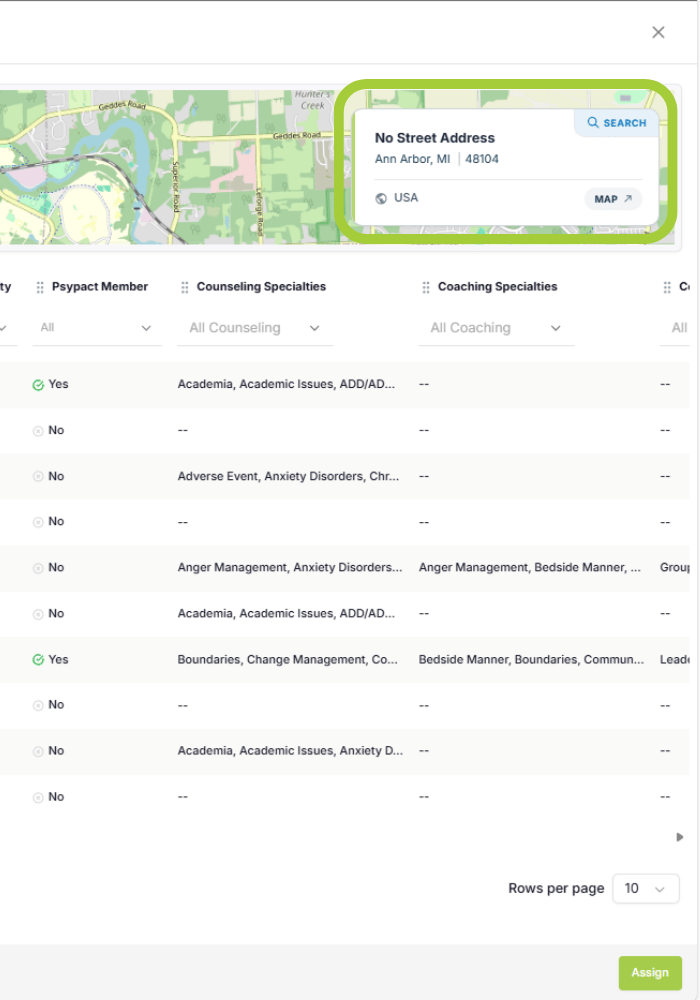
If the member does not have an address on file — or if you need to search from a different location — click the SEARCH button in the top-right corner of the map. This opens a New Address form where you can enter a street address or zip code to use as your search starting point.
Proximity Filter
Once your search location is set, use the distance slider in the top-left corner of the map to adjust the search radius (in miles).
The map and provider list will automatically update to show only providers within the selected distance.
.png?width=700&height=1000&name=Select%20a%20Provider.%20address%20search%20(1).png)
Reviewing Provider Details
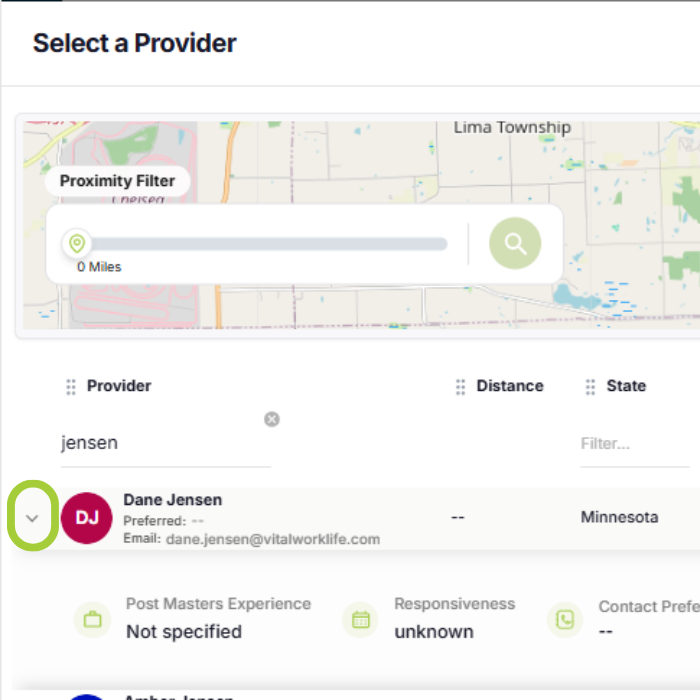
Click the expand arrow on the left side of any provider row to view additional details.
The expanded view shows information such additional provider information to help you determine best fit for your provider selection.
Select the Provider and Assign
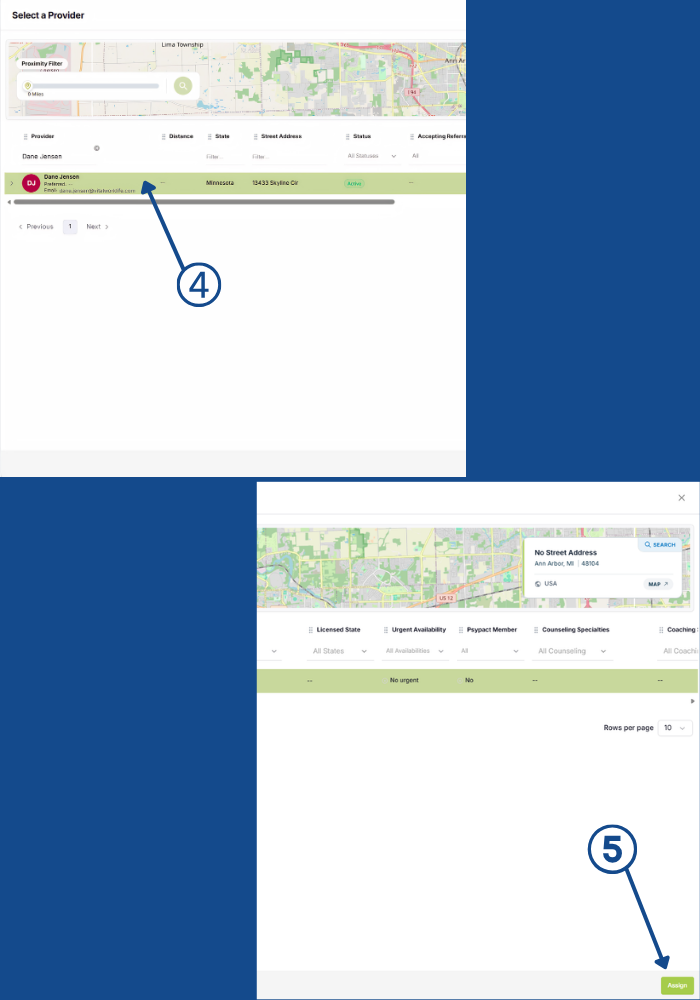
4. Click the provider’s row to select them. The row will highlight when selected.
5. Click the green Assign button in the bottom-right corner of the Select a Provider screen.
Confirm the Assignment
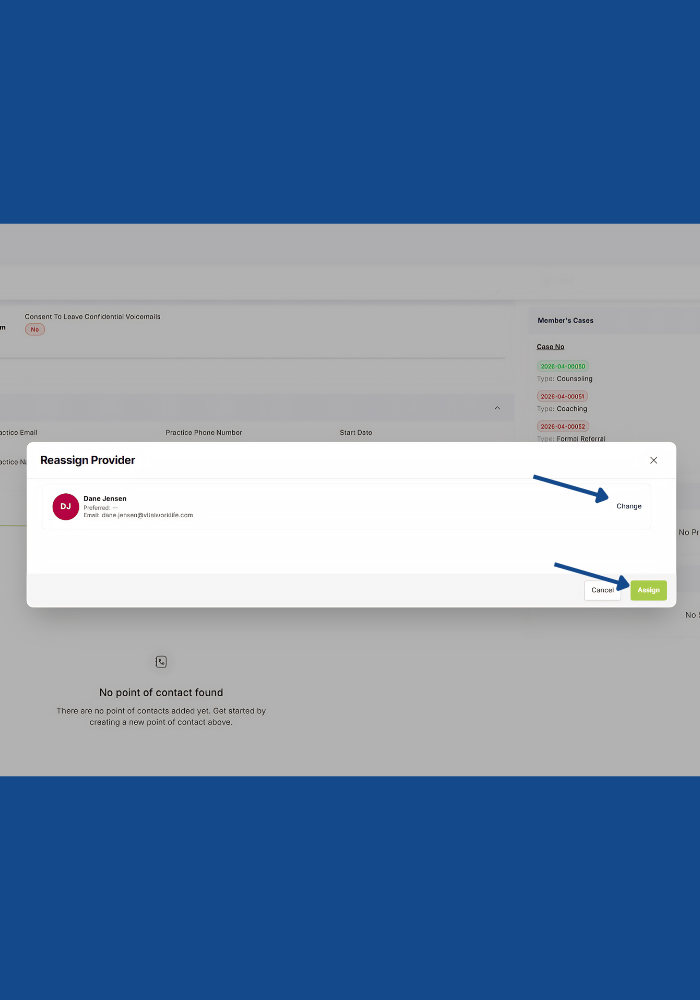
6. The Reassign Provider pop-up returns, now displaying the selected provider’s name and email. Review the selection:
• Click Change to return to the provider search and select a different provider.
• Click the green Assign button to confirm the assignment.
Once confirmed, the provider is assigned as the case owner. Their information populates the Provider Detail section on the case and the Provider panel in the right sidebar.