Main content
Quick Reference Guide
How to Submit a Session for Billing
VITALsync How To | Submit a Session for Billing
After saving a session, submit it for billing to initiate payment processing.
Find the Submit Button
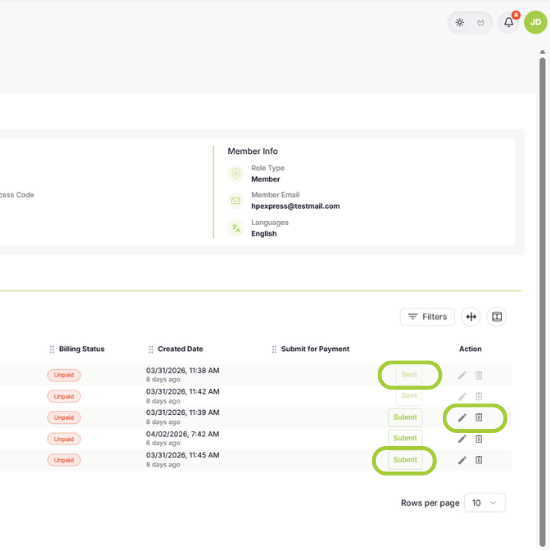
1. In the Submit for Payment column, find the green Submit button. You may have to find the scroll bar and drag to the right to see more columns.
Before you submit: Sessions that have not yet been submitted can be edited (pencil icon) or deleted (trash can icon) from the session list. Once a session is submitted, it is locked — no further edits can be made. Review all session details carefully before clicking Submit.
2. Click Submit and confirm when prompted.
3. The button changes to Sent once processed.
Note, you are able to grab and reorder the columns to your preference, just hover over a column till the cursor changes from arrow to hand. Then click and drag the selected column to where you want.
Review Session and Billing Details
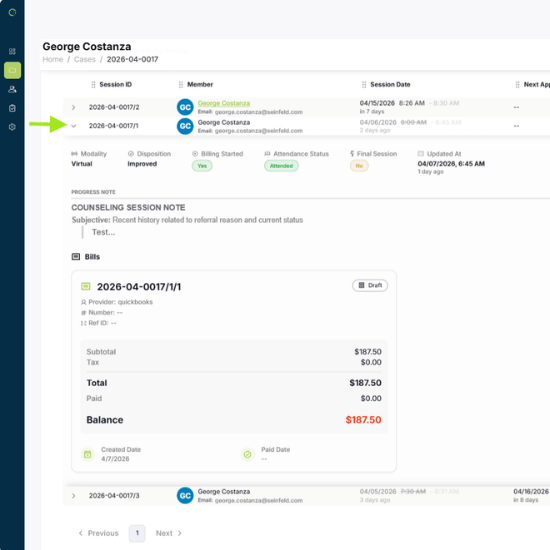
1. Click the arrow on any session row to expand it.
2. Review session details: Modality, Disposition, Attendance Status, and Progress Note.
3. Within the expansion you will also see the Bill invoice showing the total, paid amount, and balance.
| Session rejected? If billing returns a session, it becomes editable so you can correct and resubmit. You will receive a notification when a session is rejected. |